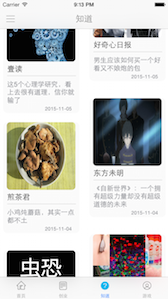
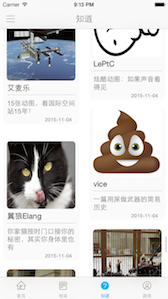
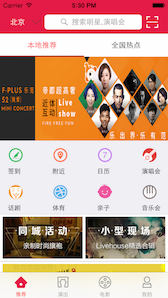
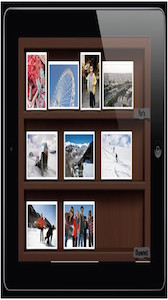
集合视图UICollectionView为iOS系统开发中一种常用的数据展示控件。当然对于初学者来说,用的较多的可能是UITableView,虽然UICollectionView和UITableView都是继承自UIScrollView,两者也有很多的共性。但对于相对复杂的展示界面,灵活的使用集合视图展示数据,能给我省去很多麻烦。
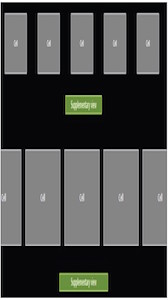
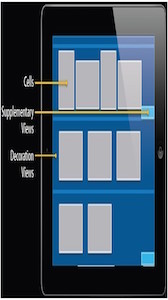
比如下面的界面:
目录
- 集合视图的基本使用
- 集合视图FlowLayout设置
- 集合视图Cell的定制
- 定制FlowLayout实现圆形效果
- 实现瀑布流效果
集合视图的基本使用
简述: 一般使用UICollectionView类来创建集合视图,同时使用UICollectionViewFlowLayout类来管理集合视图的布局。
代码:
首先创建UICollectionView
// 创建集合视图前,先要创建flowlayout(cell/item)布局的对象
UICollectionViewFlowLayout *layout = [[UICollectionViewFlowLayout     alloc] init];
// 使用布局对象,初始化集合视图
_collectionView = [[UICollectionView alloc] initWithFrame:self.view.bounds collectionViewLayout:layout];
// 设置两个代理
_collectionView.delegate = self;
_collectionView.dataSource = self;
// 将集合视图添加到屏幕上
[self.view addSubview:_collectionView];
// 和tableView不同,_collectionView的cell,必须先注册,才能使用
[_collectionView registerClass:[UICollectionViewCell class] forCellWithReuseIdentifier:@"cell"];
简单实现协议方法
// 返回有多少个cell (item)
- (NSInteger)collectionView:(UICollectionView *)collectionView     numberOfItemsInSection:(NSInteger)section {
    return 20;
}
// 返回集合视图显示的cell
- (UICollectionViewCell *)collectionView:(UICollectionView     *)collectionView cellForItemAtIndexPath:(NSIndexPath *)indexPath {
    UICollectionViewCell *cell = [collectionView dequeueReusableCellWithReuseIdentifier:@"cell" forIndexPath:indexPath];
cell.backgroundColor = [UIColor redColor];
    return cell;
}
代码说明:
- 首先通过UICollectionView定义一个_collectionView的全局变量,这样方便我们在其他地方使用它。
- 使用类UICollectionView创建一个集合视图,并使用流式布局初始化集合视图。
- 设置代理集合视图的两个代理方法,同时UICollectionView需要遵守三个协议,分别是UICollectionViewDataSource, UICollectionViewDelegate, UICollectionViewDelegateFlowLayout。
- 简单的实现代理方法,通过实现
- (UICollectionViewCell *)collectionView:(UICollectionView *)collectionView cellForItemAtIndexPath:(NSIndexPath *)indexPath;
代理方法,返回我们需要显示的Cell,当然对于集合视图的Cell,大部分情况下,都是需要用户自己去定义的,后面我们会说到。 - 创建好集合视图后,最后别忘了使用
[self.view addSubview:_collectionView];将集合视图添加到屏幕上。
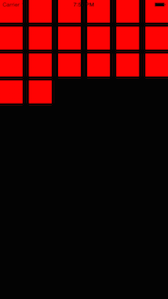
效果图:
集合视图FlowLayout设置
itemSize属性
代码:
// 设置item的大小,默认是50*50
layout.itemSize = CGSizeMake(100, 150);
代码说明:
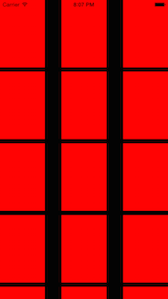
使用UICollectionViewFlowLayout的itemSize可以设置cell的大小,除了这种方法以外,我们也可以通过
- (CGSize)collectionView:(UICollectionView *)collectionView layout:(UICollectionViewLayout*)collectionViewLayout sizeForItemAtIndexPath:(NSIndexPath *)indexPath;代理方法,设置Cell的大小。效果图:
minimumLineSpacing属性
代码:
// 设置水平的最小间隔,默认是10
 layout.minimumInteritemSpacing = 20;
代码说明:
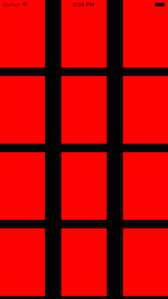
minimumLineSpacing属性可以用来设置集合视图Cell之间的水平间隔,当然水平是相对于滑动方向来说的,如果集合视图的滑动方向是水平,那么该属性便是设置垂直的最小间隔。同时注意这里设置的是最小间隔,系统会自动设置Cell之间的间隔,但是间隔总会大于或等于minimumLineSpacing设置的间隔。
效果图:
minimumInteritemSpacing属性
代码:
// 设置垂直的最小间隔,默认是10
 layout.minimumInteritemSpacing = 100;
代码说明:
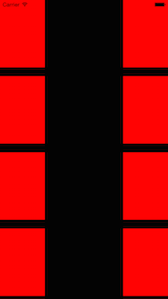
minimumInteritemSpacing属性可以用来设置集合视图Cell之间的垂直间隔,属性和minimumLineSpacing相反。
效果图:
sectionInset属性
代码:
// 设置组的边界,默认是0*0*0*0
layout.sectionInset = UIEdgeInsetsMake(20, 10, 0, 0);
代码说明:
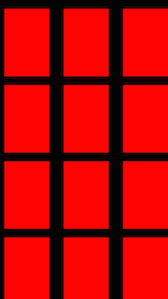
一般使用sectionInset设置组的边界。括号里的数值分别对应上、左、下、右四个边界的距离。
效果图:
scrollDirection属性
代码:
// 设置集合视图的滑动方向
layout.scrollDirection = UICollectionViewScrollDirectionVertical;
代码说明:
通过scrollDirection属性设置集合视图的滑动方向,它的值是一个枚举值,默认是垂直滑动。
- UICollectionViewScrollDirectionVertical代表垂直方向的滑动。
- UICollectionViewScrollDirectionHorizontal代表水平方向的滑动。
集合视图Cell的定制
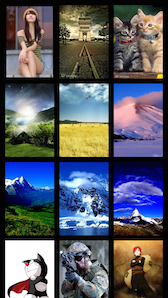
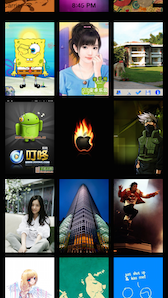
简述:和UITableView不同的是,集合视图的UICollectionViewCell并没有像UITableViewCell那样的imageView、detailTextLabel和textLabel属性,因此通常情况下都需要用户根据数据显示的格式自己定义集合视图的Cell,对于如何实现Cell的定制,下面我们以照片墙为例进行说明。
代码:
// image.h文件
#import <UIKit/UIKit.h>

@interface imageCell : UICollectionViewCell

@property (nonatomic, strong) UIImageView *image;

@end

// image.m文件
#import "imageCell.h"

@implementation imageCell

-(id)initWithFrame:(CGRect)frame
{
    if(self = [super initWithFrame:frame])
    {
        self.image = [[UIImageView alloc] initWithFrame:self.bounds];
        [self.contentView addSubview:self.image];
    }
    return self;
}

@end

// 主控制器中实现集合视图的协议方法

[_collectionView registerClass:[imageCell class] forCellWithReuseIdentifier:@"cell"];

- (UICollectionViewCell *)collectionView:(UICollectionView *)collectionView cellForItemAtIndexPath:(NSIndexPath *)indexPath {
    imageCell *cell = [collectionView dequeueReusableCellWithReuseIdentifier:@"cell" forIndexPath:indexPath];
    NSString *category = @[@"2",@"10",@"11"][indexPath.section];
    NSString *filename = [NSString stringWithFormat:@"%@_%d.jpg",category,indexPath.item+1];

    cell.image.image = [UIImage imageNamed:filename];
    return cell;
}
代码说明:
我们通过继承UICollectionViewCell来定制我们自己的Cell,首先在.h文件中创建我们想要的控件,比如代码中的image,这样做的目的也是为了方便我们在其他文件中直接使用他们,然后在.m文件中重写cell的初始化方法,并将image控件添加到cell的contentView视图上。最后在主控制器中注册我们的cell,并在cell的协议方法中,通过我们定制的cell的类来创建我们的cell。
效果图:
定制FlowLayout实现圆形效果
简述:
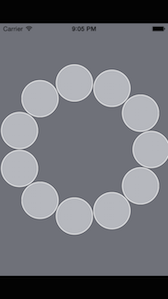
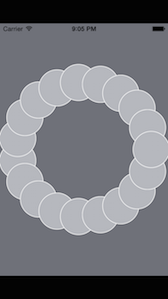
UICollectionViewLayout可以说是UICollectionView的大脑和中枢,它是UICollectionView的精髓,同时也是UICollectionView和UITableView最大的不同。layout是灵活的,它决定了集合视图如何展示在界面之上,因此,我们可以通过定制UICollectionViewLayout来实现各种各样丰富的界面效果,例如圆型效果。
代码:
// Cell.m文件,定制cell
- (id)initWithFrame:(CGRect)frame
{
    self = [super initWithFrame:frame];
    if (self) {
        self.contentView.layer.cornerRadius = 35.0;
        self.contentView.layer.borderWidth = 1.0f;
        self.contentView.layer.borderColor = [UIColor whiteColor].CGColor;
        self.contentView.backgroundColor = [UIColor underPageBackgroundColor];
    }
    return self;
}

// Line.m定制FlowLayout布局
#import "LineLayout.h"

#define ITEM_SIZE 200.0

@implementation LineLayout

#define ACTIVE_DISTANCE 200
#define ZOOM_FACTOR 0.3

-(id)init
{
    self = [super init];
    if (self) {
        self.itemSize = CGSizeMake(ITEM_SIZE, ITEM_SIZE);
        self.scrollDirection = UICollectionViewScrollDirectionHorizontal;
        self.sectionInset = UIEdgeInsetsMake(200, 0.0, 200, 0.0);
        self.minimumLineSpacing = 50.0;
    }
    return self;
}

- (BOOL)shouldInvalidateLayoutForBoundsChange:(CGRect)oldBounds
{
    return YES;
}

-(NSArray*)layoutAttributesForElementsInRect:(CGRect)rect
{
    NSArray* array = [super layoutAttributesForElementsInRect:rect];
    CGRect visibleRect;
    visibleRect.origin = self.collectionView.contentOffset;
    visibleRect.size = self.collectionView.bounds.size;

    for (UICollectionViewLayoutAttributes* attributes in array) {
        if (CGRectIntersectsRect(attributes.frame, rect)) {
            CGFloat distance = CGRectGetMidX(visibleRect) - attributes.center.x;
            CGFloat normalizedDistance = distance / ACTIVE_DISTANCE;
            if (ABS(distance) < ACTIVE_DISTANCE) {
                CGFloat zoom = 1 + ZOOM_FACTOR*(1 - ABS(normalizedDistance));
                attributes.transform3D = CATransform3DMakeScale(zoom, zoom, 1.0);
                attributes.zIndex = 1;
            }
        }
    }
    return array;
}

- (CGPoint)targetContentOffsetForProposedContentOffset:(CGPoint)proposedContentOffset withScrollingVelocity:(CGPoint)velocity
{
    CGFloat offsetAdjustment = MAXFLOAT;
    CGFloat horizontalCenter = proposedContentOffset.x + (CGRectGetWidth(self.collectionView.bounds) / 2.0);

    CGRect targetRect = CGRectMake(proposedContentOffset.x, 0.0, self.collectionView.bounds.size.width, self.collectionView.bounds.size.height);
    NSArray* array = [super layoutAttributesForElementsInRect:targetRect];

    for (UICollectionViewLayoutAttributes* layoutAttributes in array) {
        CGFloat itemHorizontalCenter = layoutAttributes.center.x;
        if (ABS(itemHorizontalCenter - horizontalCenter) < ABS(offsetAdjustment)) {
            offsetAdjustment = itemHorizontalCenter - horizontalCenter;
        }
    }
    return CGPointMake(proposedContentOffset.x + offsetAdjustment, proposedContentOffset.y);
}

@end
代码说明:
- 实现圆形布局的第一步,当然还是需要定制cell,集合视图的cell默认为矩形的,为了达到圆形的效果,我们可以在cell的初始化方法中对cell进行相应的处理,主要是通过cell的layer层的cornerRadius属性调节cell的边角弧度来实现。
- 定制cell之后,我们还需要定制我们的layout,在layout中根据圆形的cell数量,动态的计算设置cell在集合视图的位置。具体实现如以上代码。
效果图:
实现瀑布流效果
简述:
实现瀑布流的方式多种多样,我们可以利用UITableView实现,也可以通过UIScrollView实现,但是更多的,还是选择UIScrollView来实现瀑布流的效果。当然通过集合视图来实现瀑布流,每个人也有不同的方式。最常用的两种方法有:
- 通过定制FlowLayout来实现瀑布流。
- 通过创建多个CollectionView来实现瀑布流。
在这里我们使用第二种方式,我们以两列瀑布流举例说明。
代码:
//
//  AmusingViewController.m
//  Pocket IT
//
//  Created by 麦子 on 15/10/20.
//  Copyright (c) 2015年 麦子. All rights reserved.
//

#import "AmusingViewController.h"
#import "AmusingDetailController.h"
#import "AmusingPageCell.h"
#import "AmusingDataModel.h"

#define UP_URL @"http://apis.guokr.com/handpick/article.json?limit=20&ad=1&category=all&retrieve_type=by_since"
#define DOWN_URL @"http://apis.guokr.com/handpick/article.json?limit=20&ad=1&orientation=before&category=all&since=%@&retrieve_type=by_since"

@interface AmusingViewController () <UICollectionViewDelegate, UICollectionViewDataSource, UICollectionViewDelegateFlowLayout> {
    UICollectionView *_leftCollectionView;
    UICollectionView *_rightCollectionView;
    NSMutableArray *_dataArray;
    NSString *_url;
    BOOL _isRefresh;
    BOOL _isLoadMore;
}

@end

@implementation AmusingViewController

- (void)viewDidLoad {
    [super viewDidLoad];
    _dataArray = [[NSMutableArray alloc] init];
    _leftCollectionView = [self createCollectionView:@"amusingPageCell" frame:CGRectMake(0, 64, SCREEN_WIDTH/2, SCREEN_HEIGHT-64-49)];
    _rightCollectionView = [self createCollectionView:@"amusingPageCell" frame:CGRectMake(SCREEN_WIDTH/2, 64, SCREEN_WIDTH/2, SCREEN_HEIGHT-64-49)];
    [self loadNewData];
}

- (void)loadNewData {
    _url = UP_URL;
    [self loadData];
}

- (void)loadMoreData {
    _url = [NSString stringWithFormat:DOWN_URL, [[_dataArray lastObject] date_picked]];
    [self loadData];
}

- (void)loadData {
    [[MZRequestData sharedRequestData] MZCancelAllRequests];
    [[MZRequestData sharedRequestData] MZRequestWithUrl:_url success:^(NSData *requestData) {
        NSDictionary *dict = [NSJSONSerialization JSONObjectWithData:requestData options:NSJSONReadingMutableContainers error:nil];
        NSArray *dataArray = dict[@"result"];
        if (_isRefresh) {
            _isRefresh = NO;
            [_dataArray removeAllObjects];
        }
        for (NSDictionary *subDict in dataArray) {
            AmusingDataModel *model = [[AmusingDataModel alloc] initWithDictionary:subDict error:nil];
            [_dataArray addObject:model];
        }
        _isLoadMore = NO;
        [_leftCollectionView reloadData];
        [_rightCollectionView reloadData];
        _rightCollectionView.contentSize = _leftCollectionView.contentSize;
    } failed:^(NSError *error) {
        _isLoadMore = NO;
    }];
}


- (UICollectionView *)createCollectionView:(NSString *)identifier frame:(CGRect)frame{
    UICollectionViewFlowLayout *layout = [[UICollectionViewFlowLayout alloc] init];
    layout.minimumLineSpacing = 10;
    UICollectionView *collectionView = [[UICollectionView alloc] initWithFrame:frame collectionViewLayout:layout];
    collectionView.delegate = self;
    collectionView.dataSource = self;
    collectionView.showsHorizontalScrollIndicator = NO;
    collectionView.showsVerticalScrollIndicator = NO;
    collectionView.backgroundColor = [UIColor whiteColor];
    [self.view addSubview:collectionView];
    [collectionView registerNib:[UINib nibWithNibName:@"AmusingPageCell" bundle:nil]forCellWithReuseIdentifier:identifier];
    return collectionView;
}

- (NSInteger)collectionView:(UICollectionView *)collectionView numberOfItemsInSection:(NSInteger)section {
    if (collectionView == _leftCollectionView) {
        return _dataArray.count/2 + _dataArray.count%2;
    } else {
        return _dataArray.count/2;
    }
}

- (UICollectionViewCell *)collectionView:(UICollectionView *)collectionView cellForItemAtIndexPath:(NSIndexPath *)indexPath {
    AmusingPageCell *cell = nil;
    if (collectionView == _leftCollectionView) {
        cell = [collectionView dequeueReusableCellWithReuseIdentifier:@"amusingPageCell" forIndexPath:indexPath];
        [cell updateCellWithModel:_dataArray[indexPath.row*2] row:indexPath.row*2];
    } else {
        cell = [collectionView dequeueReusableCellWithReuseIdentifier:@"amusingPageCell" forIndexPath:indexPath];
        [cell updateCellWithModel:_dataArray[indexPath.row*2+1] row:indexPath.row*2+1];
    }
    return cell;
}

- (CGSize)collectionView:(UICollectionView *)collectionView layout:(UICollectionViewLayout *)collectionViewLayout sizeForItemAtIndexPath:(NSIndexPath *)indexPath {
    if (collectionView == _leftCollectionView) {
        CGFloat height = [MZHelpCenter textHeightWithText:[_dataArray[indexPath.row*2] title] font:[UIFont systemFontOfSize:15] width:SCREEN_WIDTH/2-29];
        return CGSizeMake(SCREEN_WIDTH/2, 258-20+height);
    } else {
        CGFloat height = [MZHelpCenter textHeightWithText:[_dataArray[indexPath.row*2+1] title] font:[UIFont systemFontOfSize:15] width:SCREEN_WIDTH/2-29];
        return CGSizeMake(SCREEN_WIDTH/2, 258-18+height);
    }
}

- (void)collectionView:(UICollectionView *)collectionView didSelectItemAtIndexPath:(NSIndexPath *)indexPath {
    AmusingDetailController *avc = [[AmusingDetailController alloc] init];
    if (collectionView == _leftCollectionView) {
        avc.id = [_dataArray[indexPath.row*2] id];
    } else {
        avc.id = [_dataArray[indexPath.row*2+1] id];
    }
    [self.navigationController pushViewController:avc animated:YES];
}

- (void)scrollViewDidScroll:(UIScrollView *)scrollView {
    if (scrollView == _leftCollectionView) {
        _rightCollectionView.contentOffset = _leftCollectionView.contentOffset;
    } else {
        _leftCollectionView.contentOffset = _rightCollectionView.contentOffset;
    }
    if (scrollView.contentOffset.y <= -90) {
        _isRefresh = YES;
    } else if (scrollView.contentOffset.y <= -45) {
        _isRefresh = NO;
    }
    // 下拉加载更多 (当用户拉到)
    if (scrollView.contentSize.height-scrollView.frame.size.height-scrollView.contentOffset.y <= -90) {
        if (_isLoadMore==NO) {
            [self loadMoreData];
            _isLoadMore = YES;
        }
    }
}

- (void)scrollViewDidEndDragging:(UIScrollView *)scrollView willDecelerate:(BOOL)decelerate {
    if (_isRefresh) {
        [self loadNewData];
    }
}

- (void)didReceiveMemoryWarning {
    [super didReceiveMemoryWarning];
    // Dispose of any resources that can be recreated.
}

/*
#pragma mark - Navigation

// In a storyboard-based application, you will often want to do a little preparation before navigation
- (void)prepareForSegue:(UIStoryboardSegue *)segue sender:(id)sender {
    // Get the new view controller using [segue destinationViewController].
    // Pass the selected object to the new view controller.
}
*/

@end
代码说明:
- 第一步先创建左右两个集合视图,每个集合视图所占的宽度为屏幕的一半,并将两个视图贴在屏幕的左右两边。
- 第二步定制cell,cell的定制跟据我们数据显示格式来制作,关于cell的定制上文已经详述,这里就不再赘述,不懂的请翻看上文。
- 第三步实现集合视图的协议方法,分组返回一组,cell的个数我们可以根据自己的需要自行设置。
- 第四步也是最重要的一步,我们需要根据我们显示的图片大小,label文字的多少,动态的更改我们cell的大小。
- 以上步骤完成之后,瀑布流的效果基本可以显示出来了,但是我们发现左右两个视图控制器并不能一起移动。因此,我们还需要实现最后一步。实现UIScrollView的协议方法
- (void)scrollViewDidScroll:(UIScrollView *)scrollView;当任意一个视图开始移动的时候,将两个视图的偏移量设置为相同。
效果图:
